Followers

Time In Malaysia

Thursday, August 22, 2019

How to design a Vector poster using illustrator software


ENTRI 5


1) Upload your photo

2) make sure it is a high quality picture

3) Click more setting to options to preset for size

4) For the tutorial choose the A3 size of paper

5) Add 3mm bleed and click new document

6) Bring image to new canvas

7) Press M to tidy the rectangle tools to edit rectangle edge

8) Add a shape and fill up with colour

9) design the shape according to your creativity

10) Add font and adjust the angle according to you

11) After all that click save


This is simple tutorial for more information and tutuorial you can see the video below 


How to create poster using own background by canva


ENTRI 4


1) Google Canva.com

2) Login to canva using Gmail or Facebook

3) Click poster to start design a poster

4) It will give blank poster so we can create

4) Click template

6) Choose the suitable template according to your creativity

7) Click background to enter background image

8) You can also upload your own background

9) Edit you poster according to the template you choose

7) Click text to enter text

8) Choose your favourite font


How to make a simple poster using Picsart


ENTRI 3

1) First, fill the background colour

2) Click tools and select crop

3) Choose the potrait size

4) Click draw to upload your picture

5) Click empty layer and draw outside the subject picture

6) Add text

7) Click blend to make sure the text blend with background colour

8) Edit the picture


How to create HOPE poster design using Photoshop


ENTRI 2

1) First step, upload a photo of someone that you would like to use

2) Make a selction into the subject

3) Edit background colour with 2 tone

4) Make the background blur

5) Go to filter

6) Click blur and surface blur

7) Type in 10 for radhius and threshold

8) Go back to filter and click filter gallery

9) Open artistc folder and click cutout

10) Make a number of level 5

11) to enter text open Horizontal Type Tools and pick Nevis Bold

12) Click on your document and type your text


Tutorial of banner editing using Amazing Play


ENTRI 1

1) Download PIXELLAB in Google play store

2) Start editing with selecting a background theme

3) Resize your poster size according to size that suitable for you

4) Add shape as for creative design

5) Fill a colour on the shape match with the background

6) Add another shape

7) Adjust the shape perspective angle and adjust the position 

8) Add another shape that is bigger than others and adjust the position and the size of              shape

9) Fill colour 

10) Add more shape and design it according your creativity

11) Add picture you can upload from your phone or download on web

12) you can fill the picture back of the shape that you have been design

13) You can put picture

14) Enter text and design it creatively 


Thursday, August 1, 2019

Tutorial to make a widget


A) Songs


- First, search www.soundcloud.com and choose the top first result
- Search your song at the search bar 
- Click at the picture of your song to get their URL Link and copy the link
- go to your blog and click layout then click add a gadget
- At the HTML click the + symbol
- add title and paste your link songs below. Then, click SAVE and  save arrangement. 


B) Archieve


- At your dashboard blog click LAYOUT 
- Click ADD A GADGET at the side bar-right 1
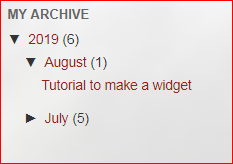
- Then, click blog archieve
- Click + symbol 
- Put a tittle for your archieve and click SAVE.


C) Clock


- Google CLOCKLINK.COM 
- At gallery choose your favourite types of  clock
- Then, choose your favourite and click get free clock
- Then you have to click accept to their terms 
- choose your clock colour and change to SELECT BY CITY. And copy the link below.
-Click LAYOUT and choose HTML then click + symbol 
- Enter the title and the copy link
- Then save it.

c) Followers 


- Sign in your blog
- At your dashboard blog click LAYOUT
- Then, at side bar click ADD A GADGET
- Click THE + symbol at FOLLOWER 
- Add your tittle and click SAVE

d) Chat Box


- First, google CBOX LIVE CHAT
- Then, insert your email address
- Insert your details in create box then click create a box
- Copy the URL Link
- Sign in blog then click LAYOUT
- At side bar click ADD A GADGET
- Click + symbol at HTML then paste the copy link 
- Last click SAVE

e) Link Within 


- Google www.linkwithin.com
- Insert your details and click GET WIDGET
- Then click INSTALL WIDGET 
- Select your a blog and tittle then  click ADD A WIDGET

- Then click SAVE.

Related Posts Plugin for WordPress, Blogger...